本文最后更新于 121 天前,其中的信息可能已经有所发展或是发生改变。
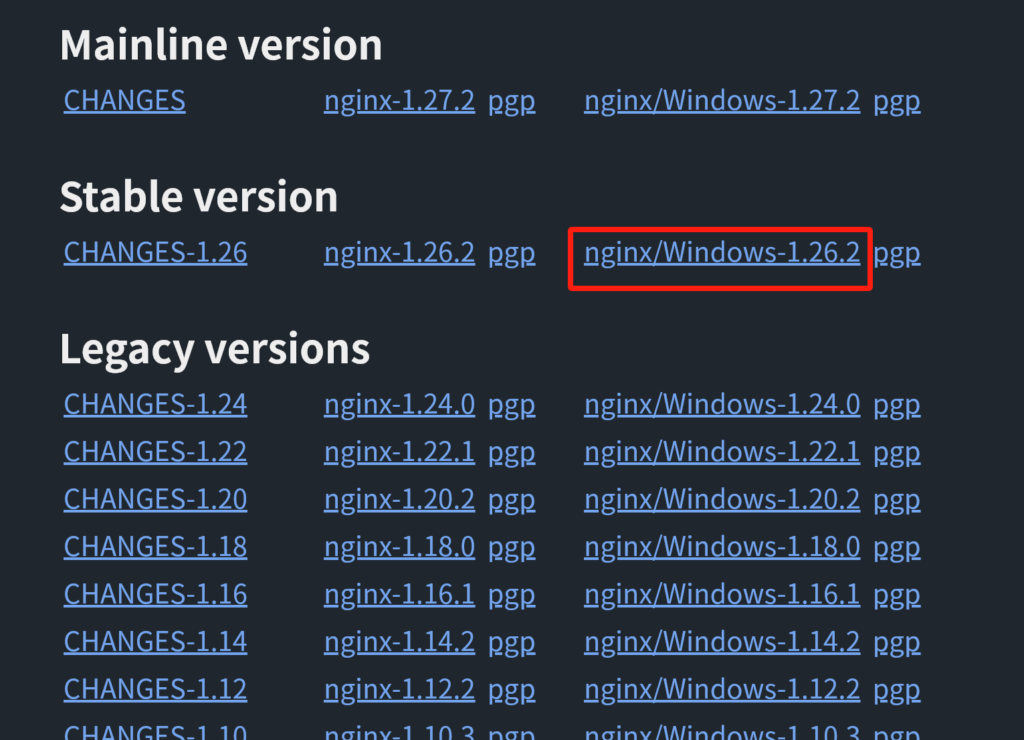
下载nginx:nginx: download

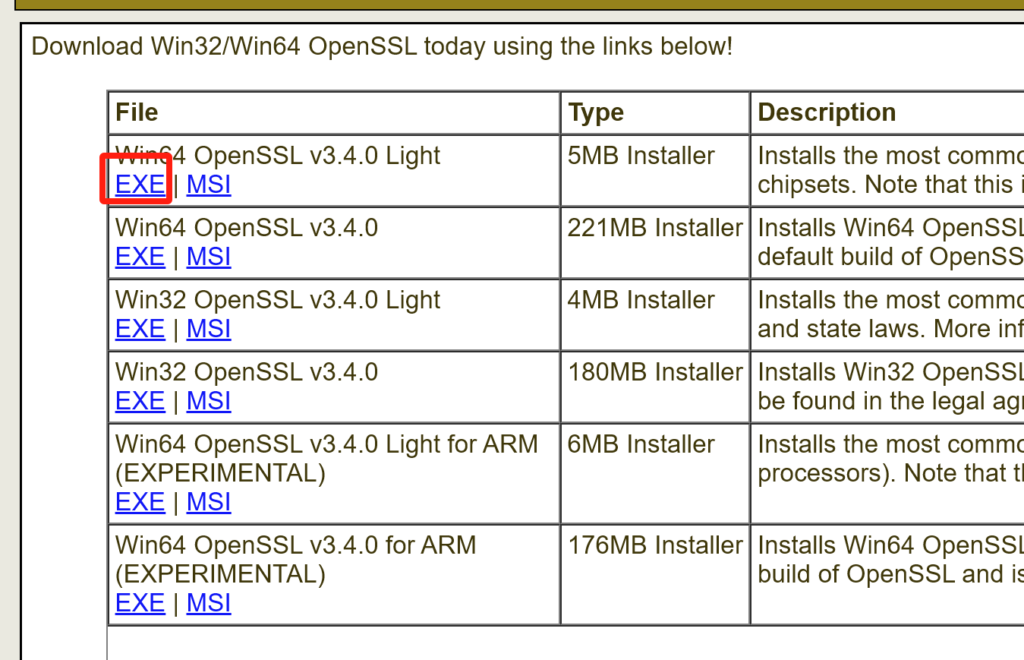
下载openssl:Win32/Win64 OpenSSL Installer for Windows – Shining Light Productions

安装后执行命令:
openssl req -x509 -nodes -days 365 -newkey rsa:2048 -keyout cert.key -out cert.pem生成cert.key和cert.pem
分别作为ssl_certificate_key和ssl_certificate
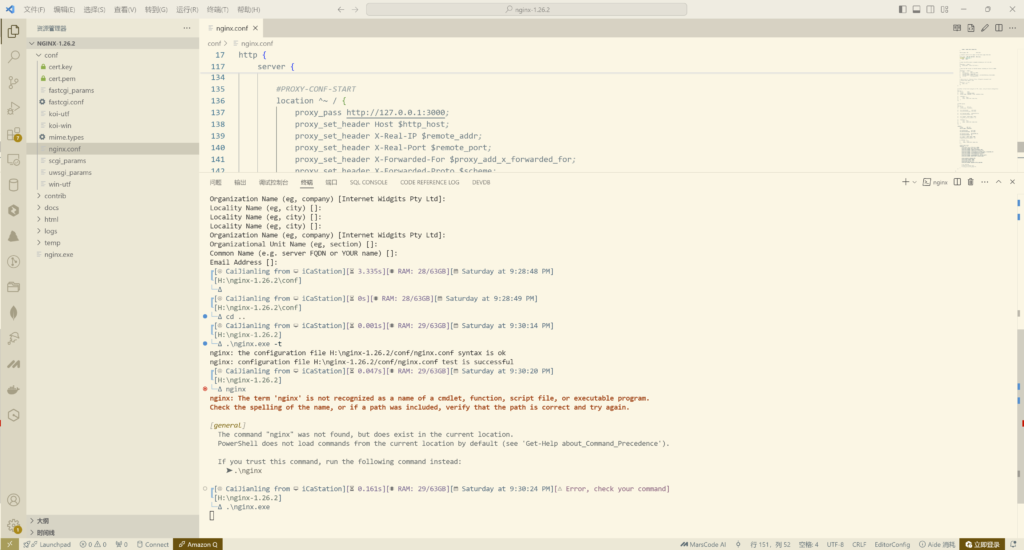
具体操作如下图所示:


解释:
首先进入Nginx目录:H:\nginx-1.26.2
:: 进入conf目录
cd .\conf\
:: 生成ssl证书
openssl req -x509 -nodes -days 365 -newkey rsa:2048 -keyout cert.key -out cert.pem
:: 键入回车进入系统
:: 返回上级进入Nginx主目录
cd ..
:: 确认Ningx配置文件无问题
.\nginx.exe -t
:: 如果是successful即无问题
:: 执行Nginx
.\nginx
另外,执行完.\nginx后就可以把命令窗口关闭了,如需要停止则再执行:
.\nginx -s stop如为fastgpt开启ssl的nginx.conf配置文件附加内容:
# ...
http {
    # ...
    server {
        listen       443 ssl;
        listen       4000 ssl;
        server_name  localhost;
        ssl_certificate      cert.pem;
        ssl_certificate_key  cert.key;

        ssl_session_cache    shared:SSL:1m;
        ssl_session_timeout  5m;

        ssl_ciphers  HIGH:!aNULL:!MD5;
        ssl_prefer_server_ciphers  on;

        # location / {
        #     root   html;
        #     index  index.html index.htm;
        # }

        #PROXY-CONF-START
        location ^~ / {
            proxy_pass http://127.0.0.1:3000;
            proxy_set_header Host $http_host;
            proxy_set_header X-Real-IP $remote_addr;
            proxy_set_header X-Real-Port $remote_port;
            proxy_set_header X-Forwarded-For $proxy_add_x_forwarded_for;
            proxy_set_header X-Forwarded-Proto $scheme;
            proxy_set_header X-Forwarded-Host $host;
            proxy_set_header X-Forwarded-Port $server_port;
            proxy_set_header REMOTE-HOST $remote_addr;

            proxy_connect_timeout 60s;
            proxy_send_timeout 600s;
            proxy_read_timeout 600s;
            proxy_http_version 1.1;
            proxy_set_header Upgrade $http_upgrade;

            # 绕过SSL验证
            # proxy_ssl_verify off;
            # proxy_ssl_verify_depth 0;
        }
    }
}启动nginx后即可用https://127.0.0.1(https://localhost)或https://127.0.0.1:4000(https://localhost:4000)访问本地http://127.0.0.1:3000上的fastgpt了。


